
Introducing The Brick Chic Lamp!
I knew I wanted to make a lamp... because we actually needed one (always the best way!) and sadly I have no budget after our recent house move and my car quite literally dying, to buy anything new - always happens at once, feeling pretty chipper though after this make!
The brief was to use old scrap building materials, we had a hunt around the garage, then the garden and soon found a pair of old bricks, they've been outside and they are rather beautifully aged with little spots of moss, I love them!

The bricks would be the base!
This was the sketch idea...

I amassed all the various bits and bobs we would need! With a significant element missing still as the shade had still not been decided on...

I have masses of old coffee tins - they look amazing if you spray paint them and use them as pen pots etc so I make sure I drink at least 17 cups a day - I always have a few handy, so they had to be included!
In this project I used the base of two coffee tins riveted together to hold the bricks apart and to give it a little industrial chic look - any old metal pipe would have worked too but we didn't have any. I had to scrub of the print with some wire wool, doesn't take long.


I got my other half involved too and asked him to drill some holes through to create space for the wire from the donor lamp and to secure the tins (we used plugs). It hurts me to say this but he's just better at drilling holes than me... whyyyyyy??

The 'donor' lamp worked still but the base was damaged and the shade mangled, so it had been in a 'to fix' pile for some time.
I have masses of old coffee tins - they look amazing if you spray paint them and use them as pen pots etc so I make sure I drink at least 17 cups a day - I always have a few handy, so they had to be included!
In this project I used the base of two coffee tins riveted together to hold the bricks apart and to give it a little industrial chic look - any old metal pipe would have worked too but we didn't have any. I had to scrub of the print with some wire wool, doesn't take long.
Next I cut the bottom off the tins - it's easier if you add some tape.
Holes are looking good!

These are the rivets, which are just aesthetic - I think they look great, it gives a strong look to the tins which you need when you're holding up bricks.
When we moved in we had to dog proof the garden and luckily had a strip left over - with a little added fabric for the shade this fitted the bill perfectly, the compromise was making the shade oval not rectangular - but I think it looks amazing!

I got to do some sewing! I made a rectangle of fabric and just hemmed the raw edges.

This was the clever bit - bending the snipped edges of the wire in order to grab the fabric and create a shade - pliers needed!
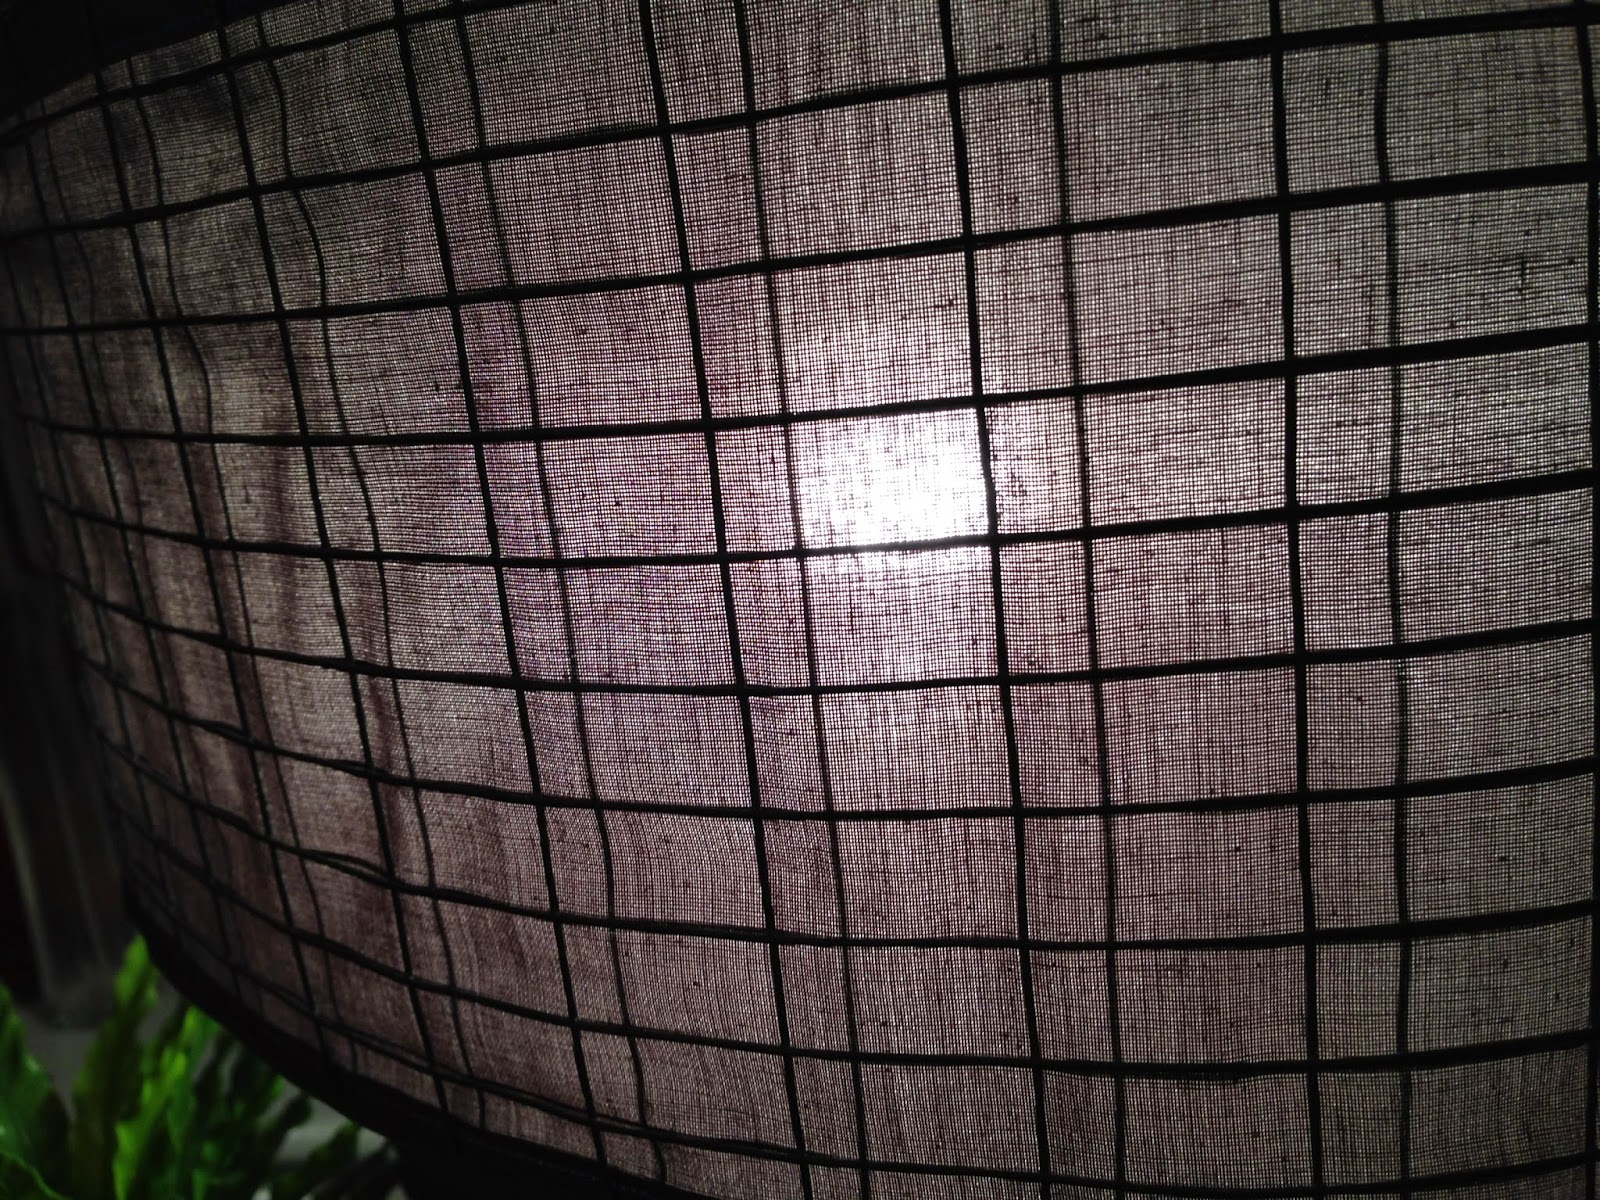
Don't you think the shade looks good - the wire we found has been wrapped twice to contain the fabric so you get the fantastic check effect when the light is switched on. The fabric is just a very cheap and thin grey cotton I had, but with the wire shade it looks expensive! I was hunting for linen but I think this actally gives more light.
I hope you have enjoyed looking at the steps to make this upcycled lamp - here are a few more pics of the finished lamp, we are so chuffed with it!


My beautiful pink socked, pink nailed daughter - happy to model for pics :)
I really hope you like the lamp! Would love your feedback :)